The CARE DICOM Anonymizer app is a tool for quickly and easily removing patient identifying information from medical images in DICOM format. (What is DICOM?) The software works only with DICOM format images. It cannot read or display images in any other format, like JPEG or PNG.
This app is primarily designed for physicians and researchers who want to send anonymized images to CARE Arthritis. It can also be used to anonymize images for your own use, without sending them to CARE. It includes a rudimentary DICOM viewer that lets you view all kinds of DICOM images (X-Ray, MRI, CT, etc.), scroll through MRI and CT sequences, zoom in on areas of interest, and edit images to block out certain areas.
The anonymizer engine performs a deep anonymization by default. That means not only that the standard patient information tags from the DICOM meta-data are replaced or removed, but that all non-standard meta-data (i.e., tags that are not part of the DICOM standard, but may be included by some medical imaging equipment) is also removed. These non-standard tags sometimes hide additional patient information that slips past other anonymizers. Removing them is completely safe, as they have no effect on the ability of DICOM viewing software to accurately display images.
Note: You must have Administrator privileges to install software on Microsoft Windows computers. You may require assistance from your local IT administrator to install this software.
Download the CARE DICOM Anonymizer from the downloads page.
Depending on the web browser you're using, you may be asked if you want to Run or Save the file, or it may be downloaded to your Downloads folder. In any case, find the downloaded file (it will be named "CARE_DICOM_Anonymizer_Install.msi" or something similar) and run it.
You may see a security warning such as the example below.
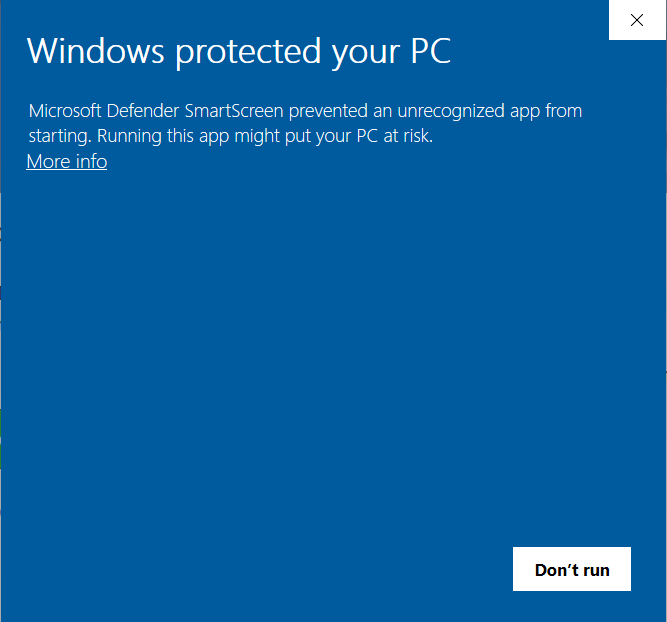
Click More Info, which will reveal some additional information and a new button at the bottom:
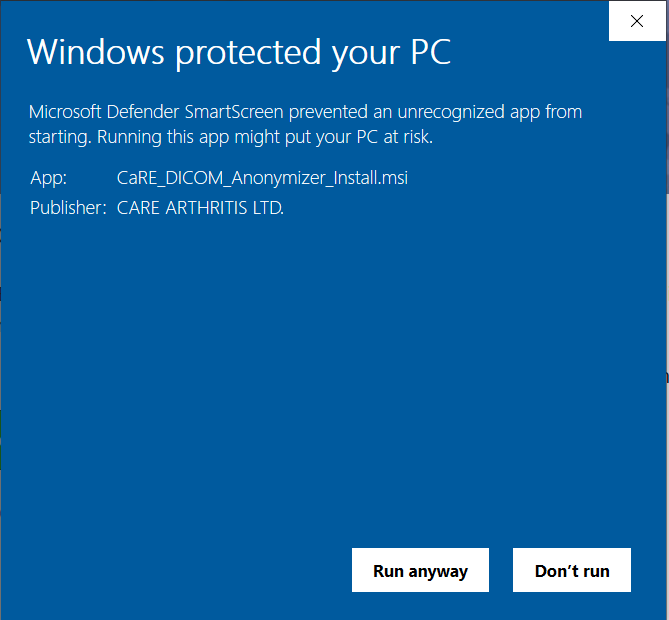
Ensure the Publisher is "CARE ARTHRITIS LTD.", and click Run anyway.
Next, you will probably see another security warning:
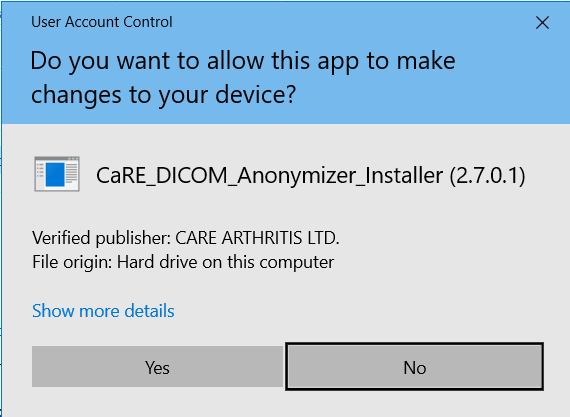
Again, ensure the verified publisher is "CARE ARTHRITIS LTD." and click Yes.
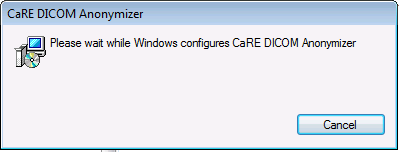
You should see a small window or two flash on the screen indicating the software is being installed. Once the windows are gone, the software is finished installing.
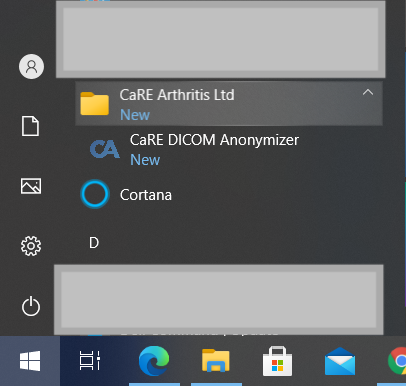
Run the software from the Windows menu:
Note: You must have Administrator privileges to install software on Mac computers. You may require assistance from your local IT administrator to install this software.
Download the CARE DICOM Anonymizer from the downloads page.
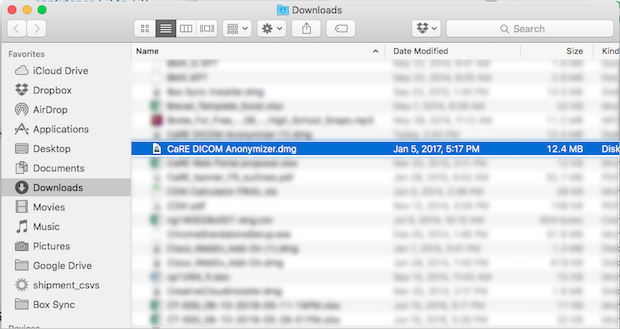
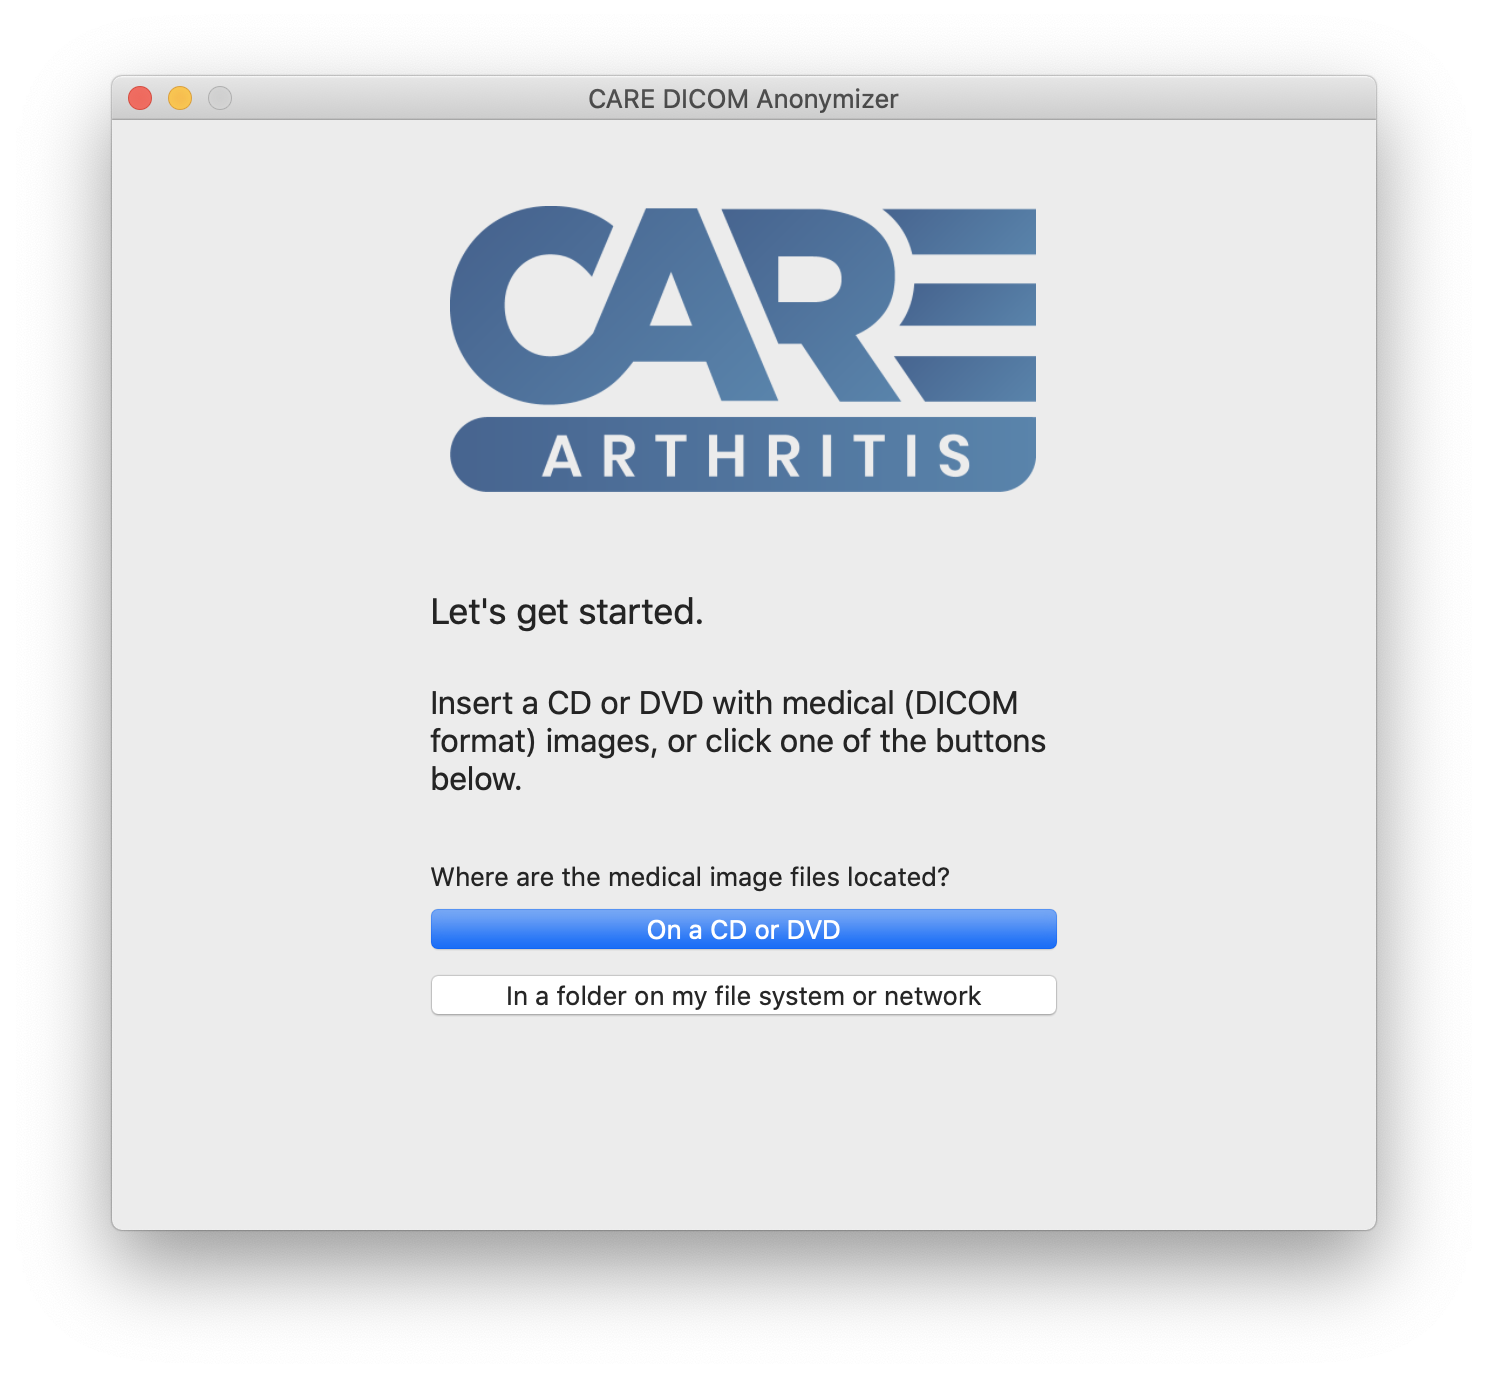
Open the downloaded file. It will be named "CARE DICOM Anonymizer" or something similar. You can find the downloaded file in the Downloads folder, easily accessible from the Mac Finder.
Once you've opened the file, you should see a window similar to the image below:
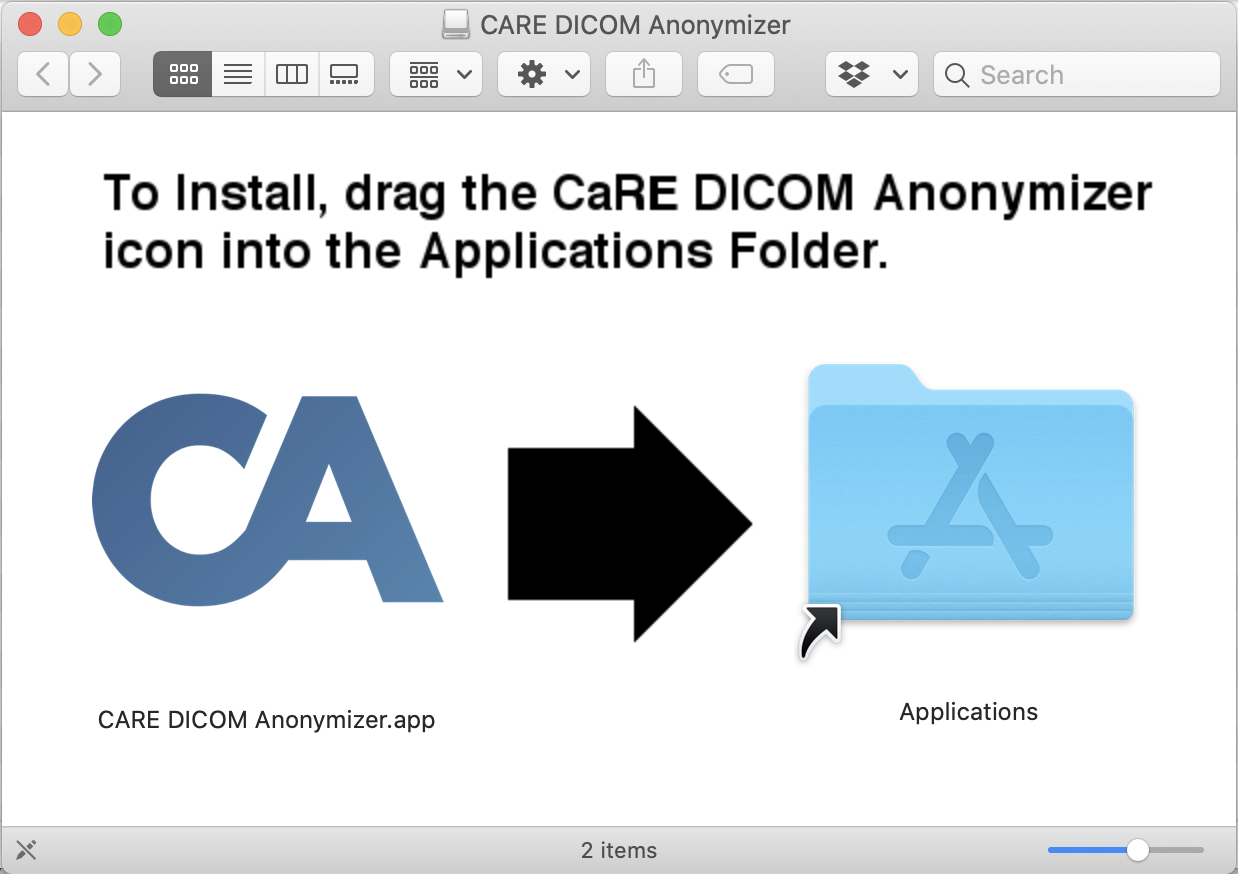
Click and hold the CARE Arthritis icon, then drag the icon on top of the blue Applications folder. Release, and the anonymizer software will be installed.
If you have trouble installing or running the app, you may have to adjust your security settings. You may see a message like this:
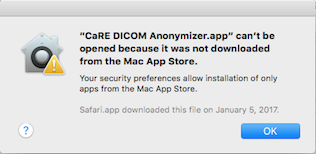
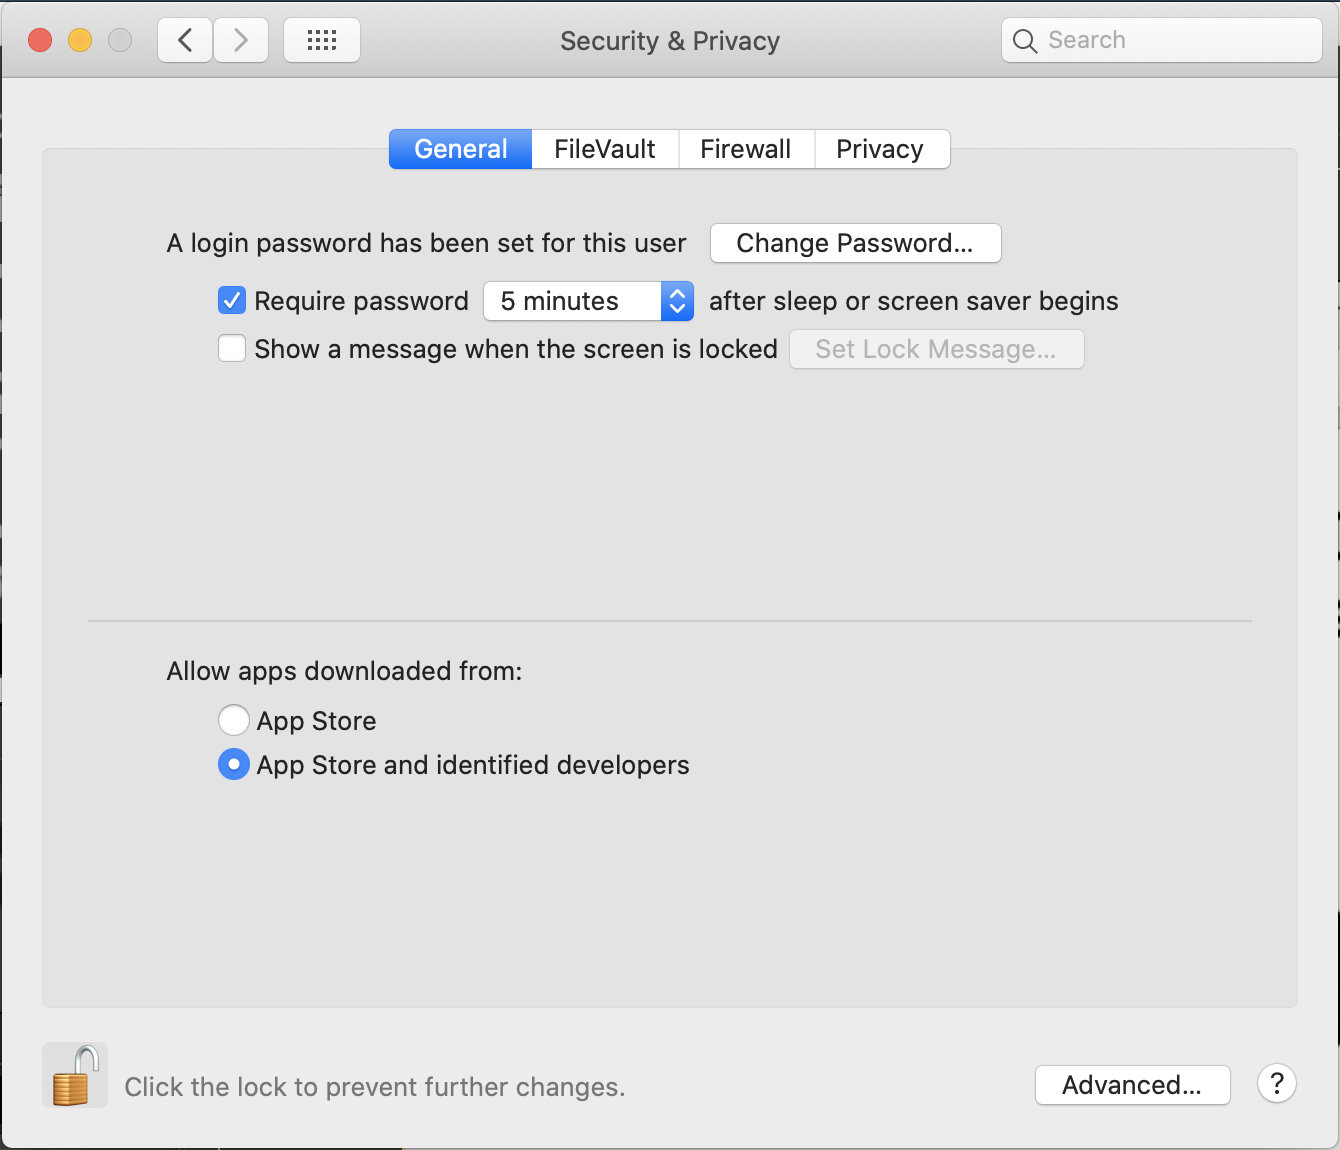
In that case, open your System Preferences and click on Security and Privacy.
If necessary, click the padlock at the bottom to enable changes. Change the setting,
"Allow apps downloaded from:" to "App Store and identified developers".
Then install and/or run the app again.
Make sure you have images in DICOM format. You may get images on a CD or DVD from your radiology centre, or you may be able to download them from a PACS system. If you are unsure if your images are in DICOM format, ask your radiology centre for help.
Create a case on the CARE Arthritis website. From the CARE Arthritis home page, click on "Feature Case" or "Submit Images for Case Presentation" under the "Education" category and follow the links. For a workshop, please use the Case Presentation link. At the end of the process, you will receive a Case Number. Make a note of the case number. You will also receive an email with your case number and case information.
If you haven't already, download and install the CARE DICOM anonymizer.
Run the CARE DICOM Anonymizer software.
If your images are on a CD or DVD, insert the disc into your optical drive, and the software will automatically scan the disc.
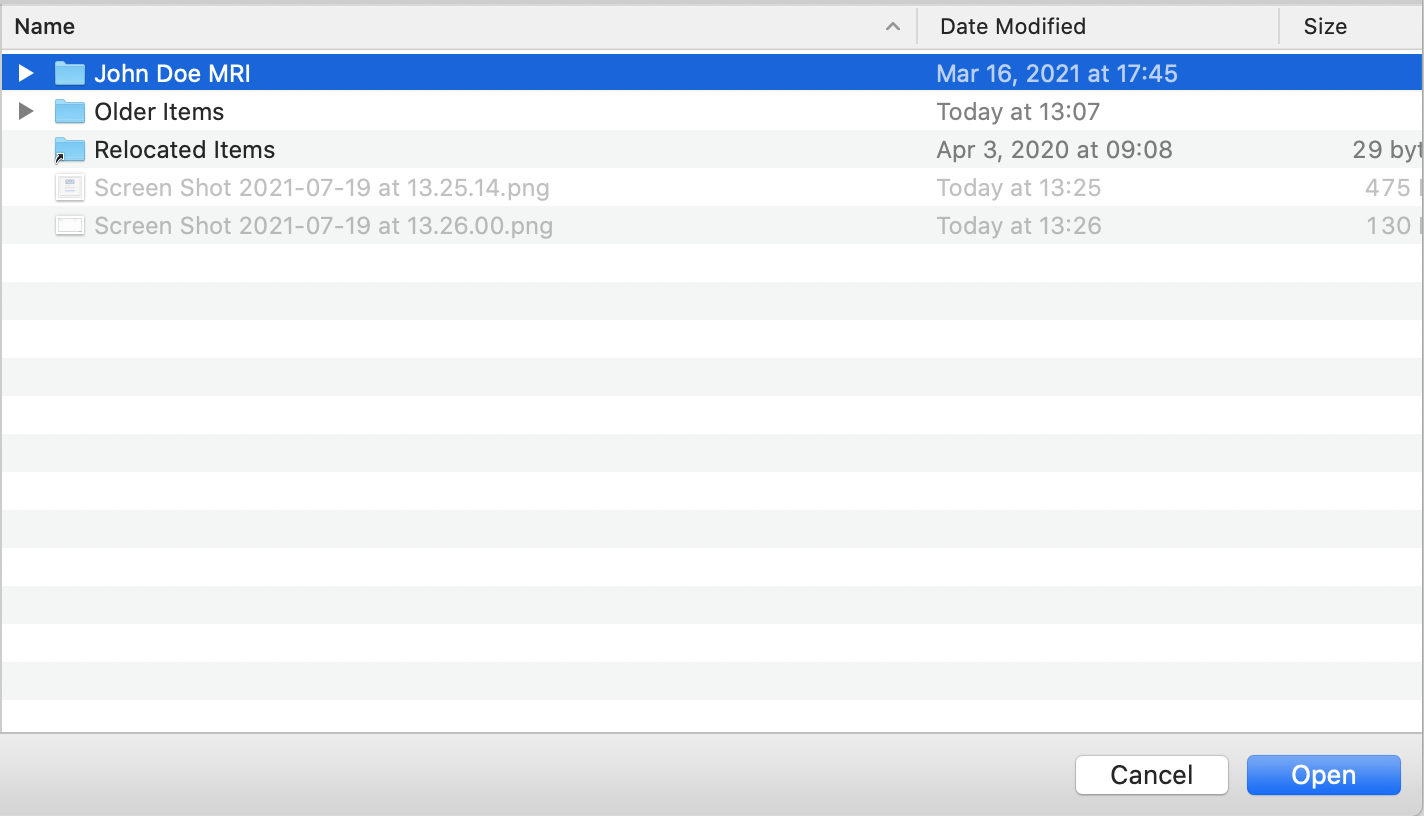
Otherwise, if your images are somewhere on your computer or network, click the button, "In a folder on my file system or network". In the pop-up window, navigate to the folder where the images are located and click on the folder. Click "Open" (on a Mac) or "OK" (on a Windows PC).
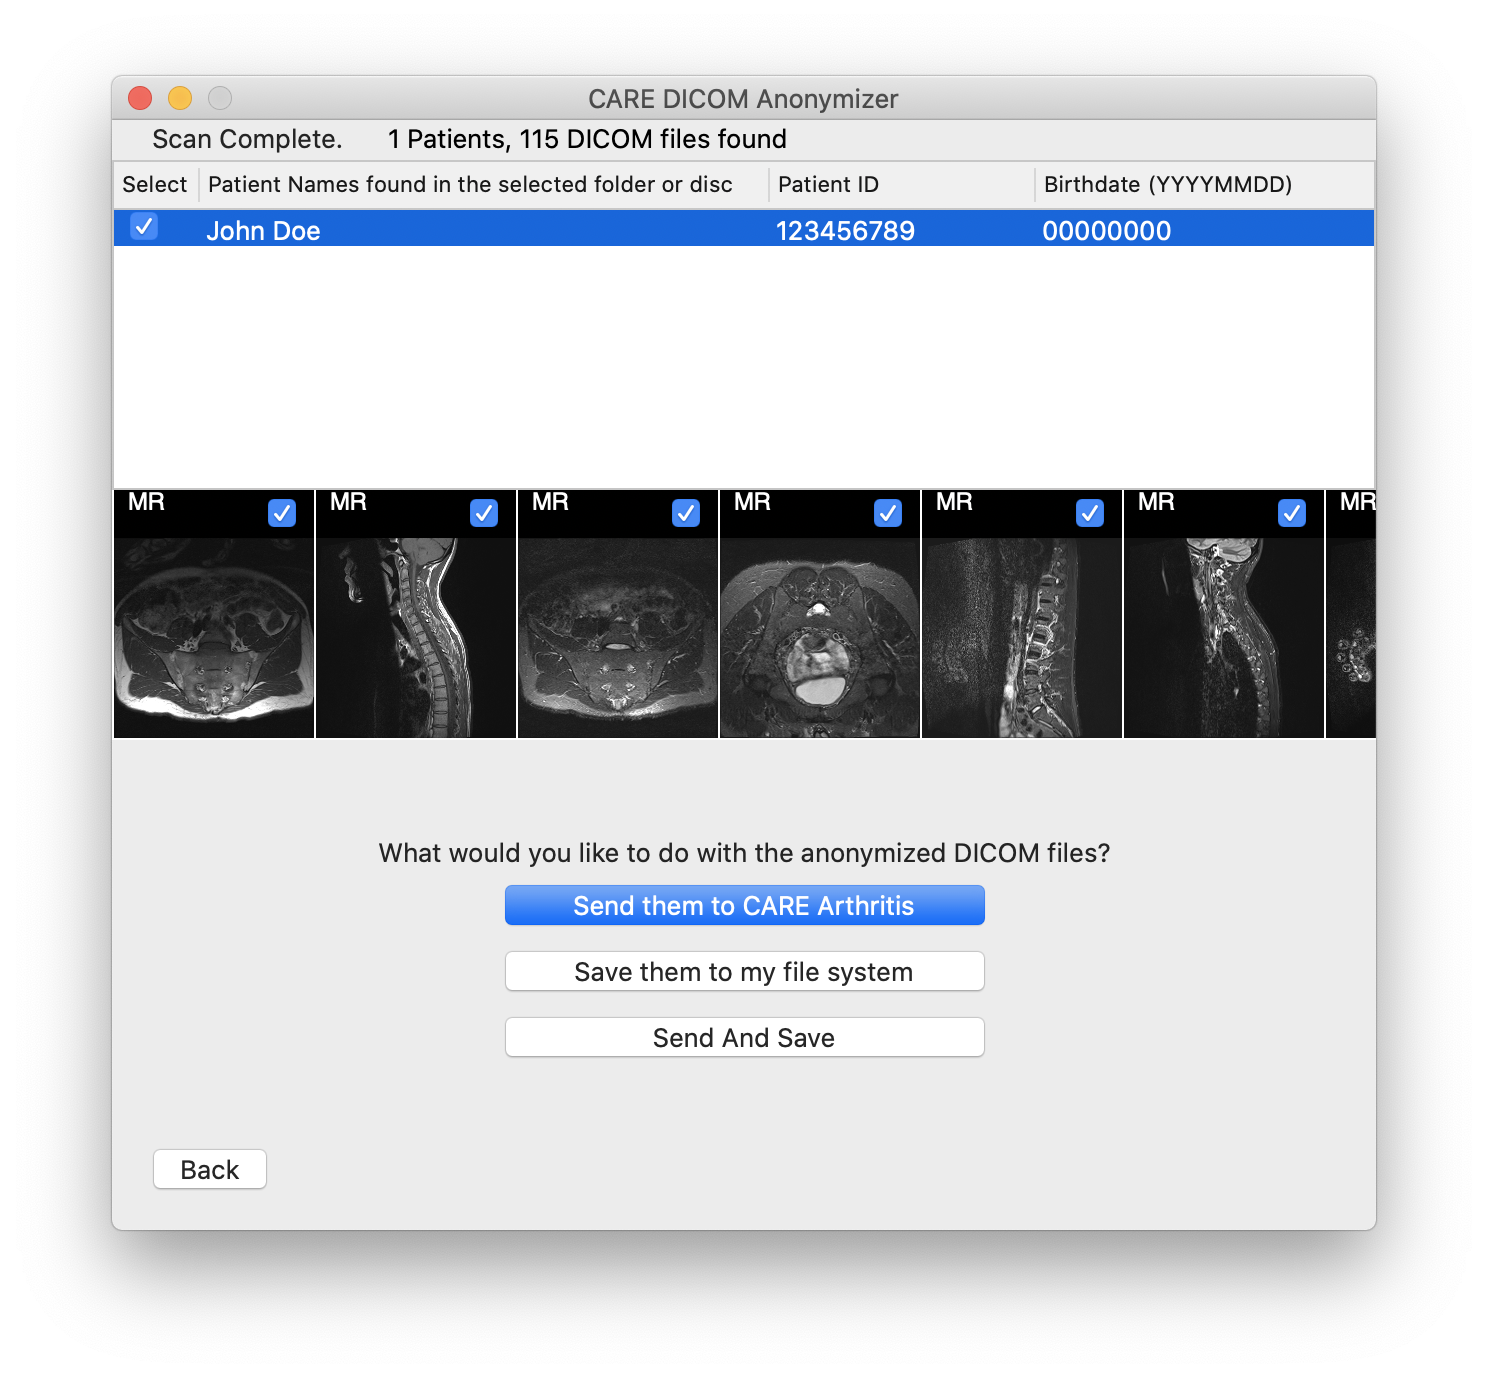
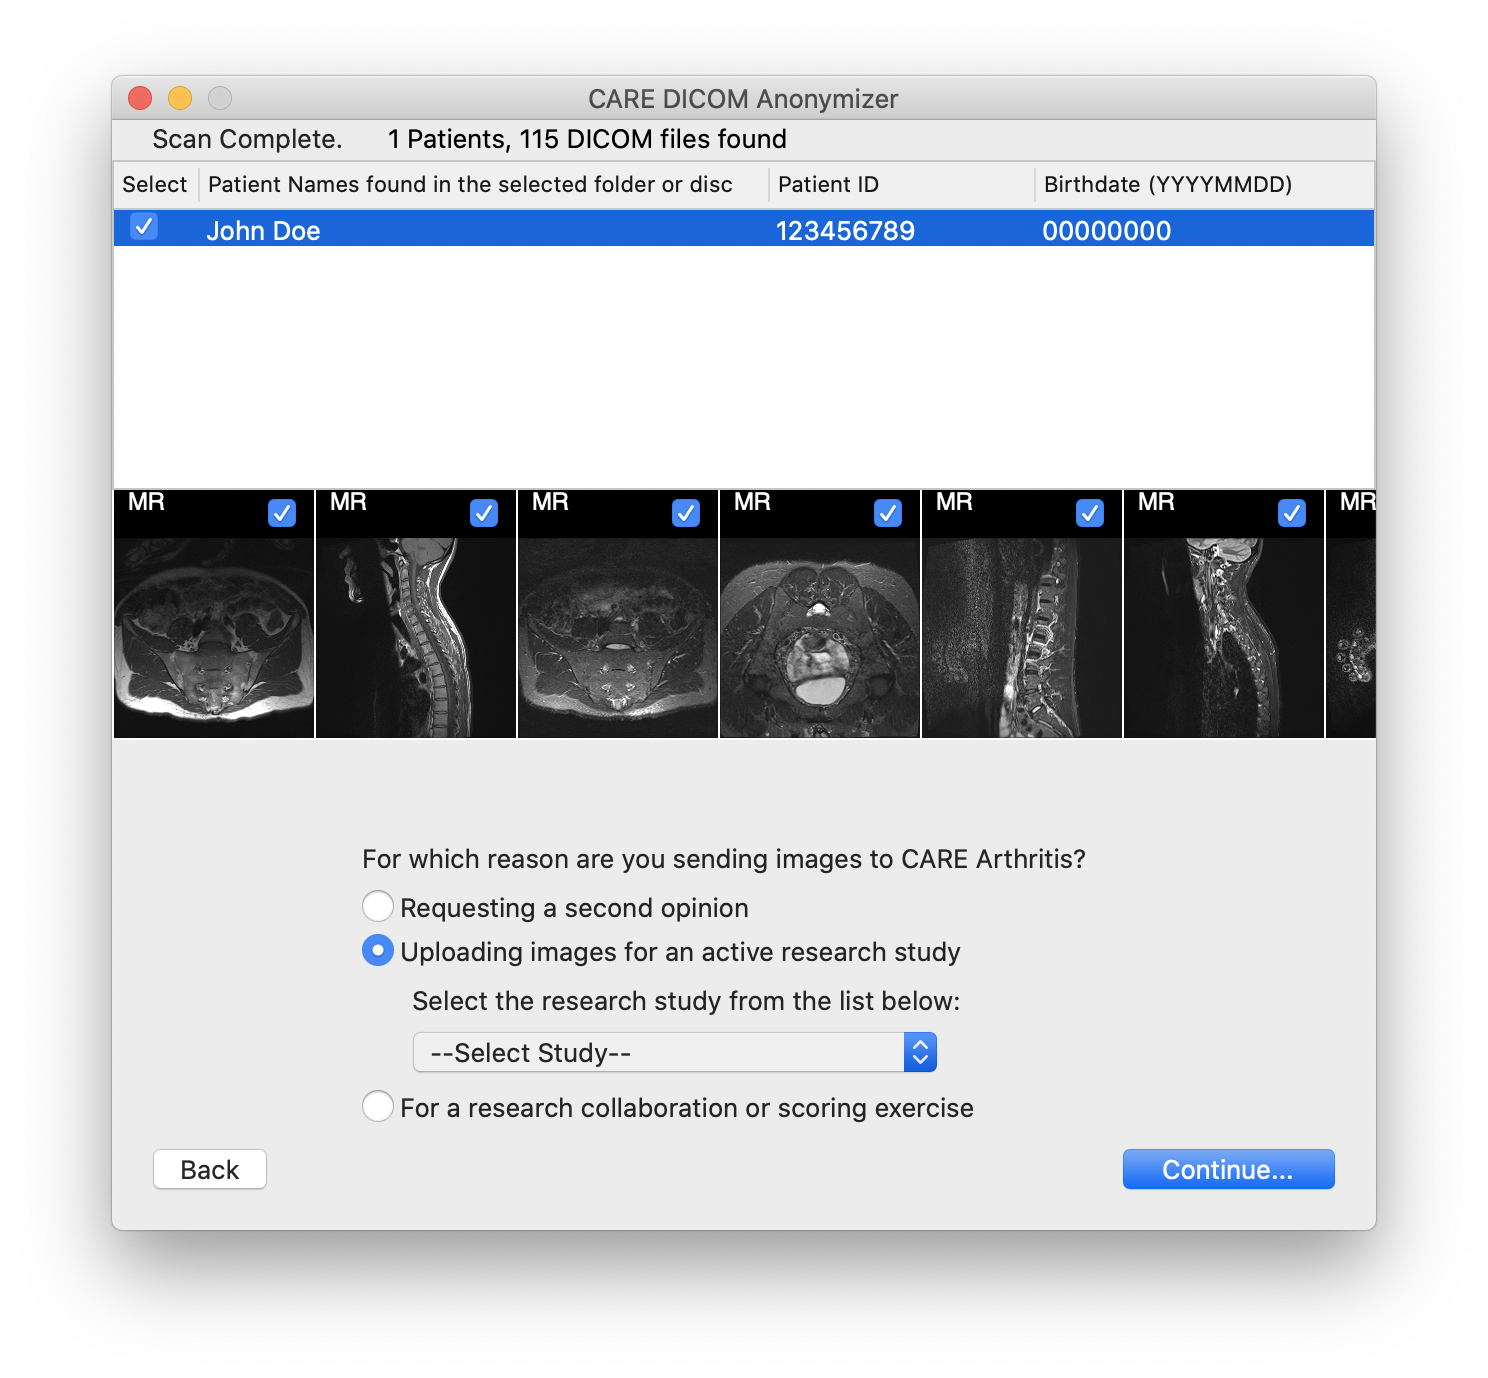
The disc or folder will be scanned for DICOM format images. All sub-folders will be scanned as well. A summary of how many DICOM files were found and how many distinct patients the images belong to will be displayed at the top of the window.
If the software did not find any images, then no DICOM format images exist in the selected folder or any subfolders. Click on the Back button and select a different folder.
Review the patients and images discovered by the software.
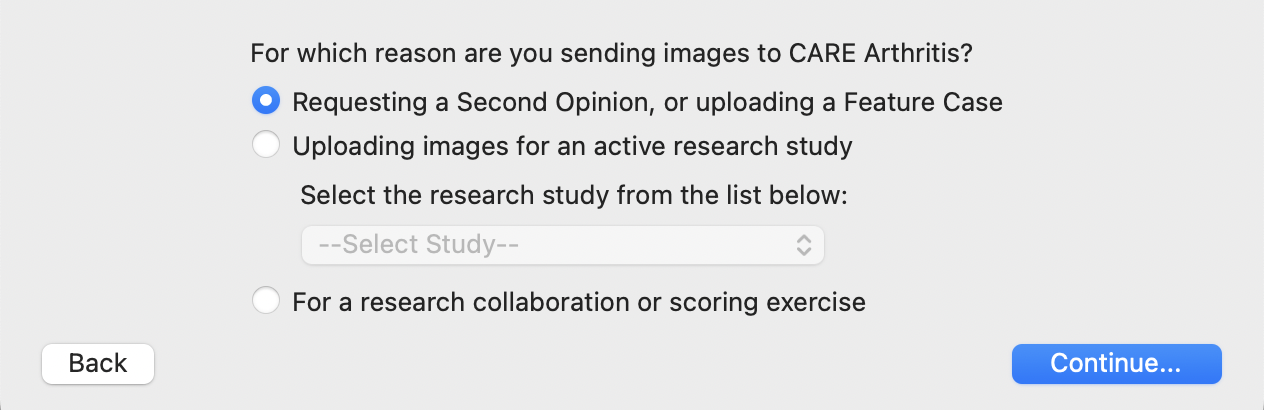
Click on the button "Send them to CARE Arthritis".
Select the option "Submitting images for a Case Presentation". Select this option as well if you are sending images to CARE for a workshop.
Enter the same email address that you entered when creating your case. Enter the case number you received when you submitted your case information.
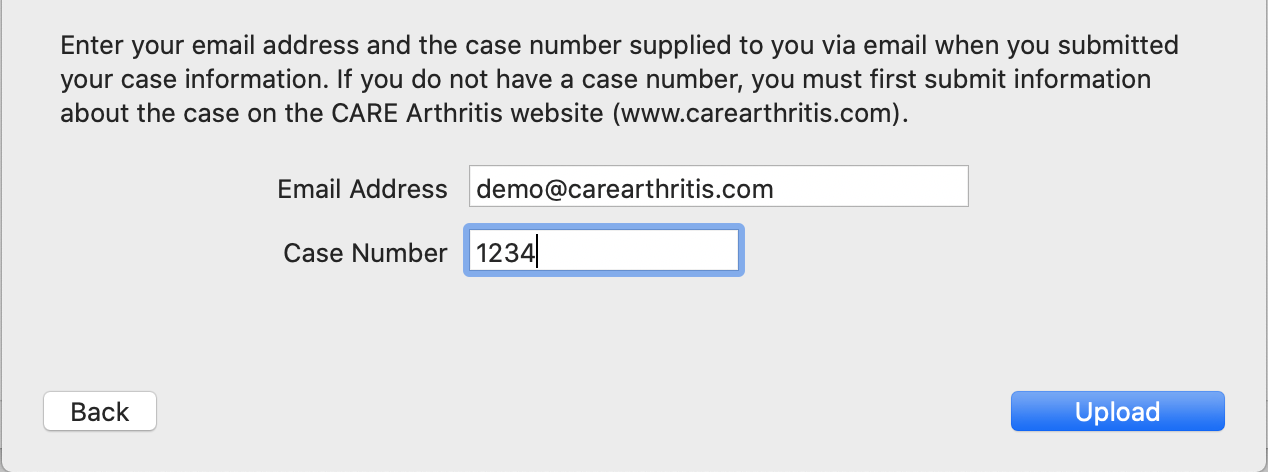
Click "Upload", and the images will be anonymized and sent to CARE. Please note that images are anonymized before they leave your computer. No patient identifying information is sent to CARE.

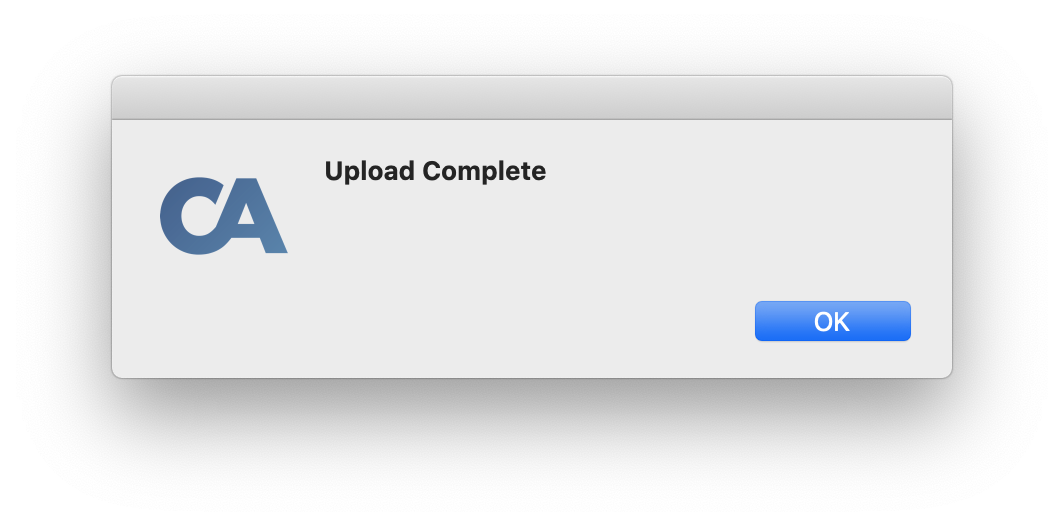
Wait for the upload process to finish.
Make sure you have images in DICOM format. You may get images on a CD or DVD from your radiology centre, or you may be able to download them from a PACS system. If you are unsure if your images are in DICOM format, ask your radiology centre for help.
You must already have the patient data entered in the clinical eCRF in order to upload images for that patient.
If you haven't already, download and install the CARE DICOM anonymizer.
Run the CARE DICOM Anonymizer software.
If your images are on a CD or DVD, insert the disc into your optical drive, and the software will automatically scan the disc.
Otherwise, if your images are somewhere on your computer or network, click the button, "In a folder on my file system or network". In the pop-up window, navigate to the folder where the images are located and click on the folder. Click "Open" (on a Mac) or "OK" (on a Windows PC).
The disc or folder will be scanned for DICOM format images. All sub-folders will be scanned as well. A summary of how many DICOM files were found and how many distinct patients the images belong to will be displayed at the top of the window.
If the software did not find any images, then no DICOM format images exist in the selected folder or any subfolders. Click on the Back button and select a different folder.
Review the patients and images discovered by the software.
Click on the button "Send them to CARE Arthritis".
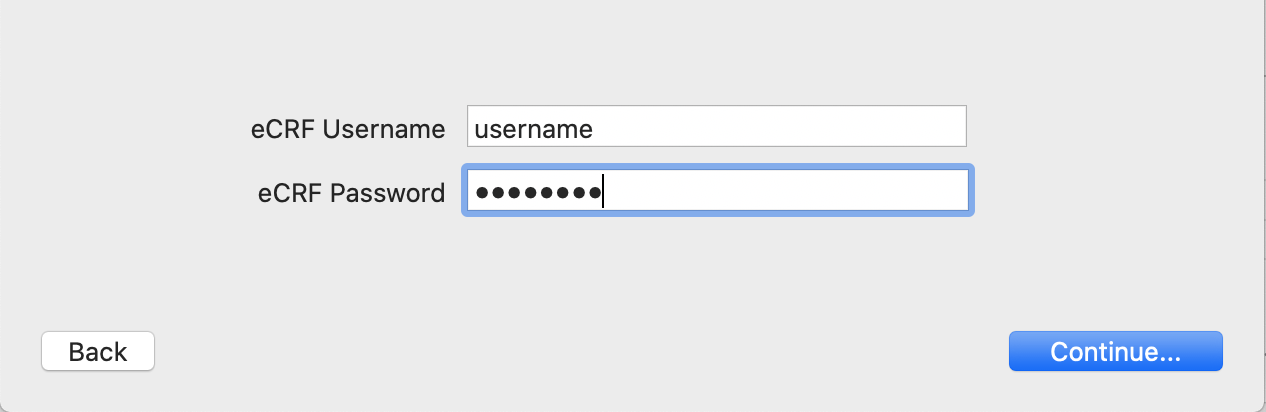
Select the option "Uploading images for an active research study". Then, select the applicable study from the drop-down list below.
Enter the username and password that you use to access the clinical eCRF.
A list of patients from your study site will be available. Select the patient
study ID that corresponds to the patient name from the images.
Some studies may also require you to select a specific visit to which to associate
the images.

Check the box, "Anonymize Birth Date" only if required by your local regulations, i.e., if your local regulations do not permit the sharing of study subject birth dates. If you check this box, please check the next box, "Keep birth year" if allowable. This will remove the day and month information from the patient's birth date, but retain the year of birth. (Why is this important?)
Click the Upload button, and the images will be anonymized and sent to CARE. Please note that images are anonymized before they leave your computer. No patient identifying information is sent to CARE.
Wait for the upload process to finish.
The CARE DICOM Anonymizer includes a rudimentary DICOM viewer with simple controls, perfect for non-radiologist physicians who want to view their own patient's images.
The viewer includes an editing function where rectangular portions of the images can be blocked out. This is useful if patient identifying information is burned into the images themselves. Such information must be occluded before sending the images to CARE.
After your disc or folder is scanned, the software will display a list of patient names at the top, and below that, a series of image thumbnails for the currently selected patient.
Double-click on either the patient name, or on any of the thumbnails. A new window will open, and a larger version of the image will be displayed.
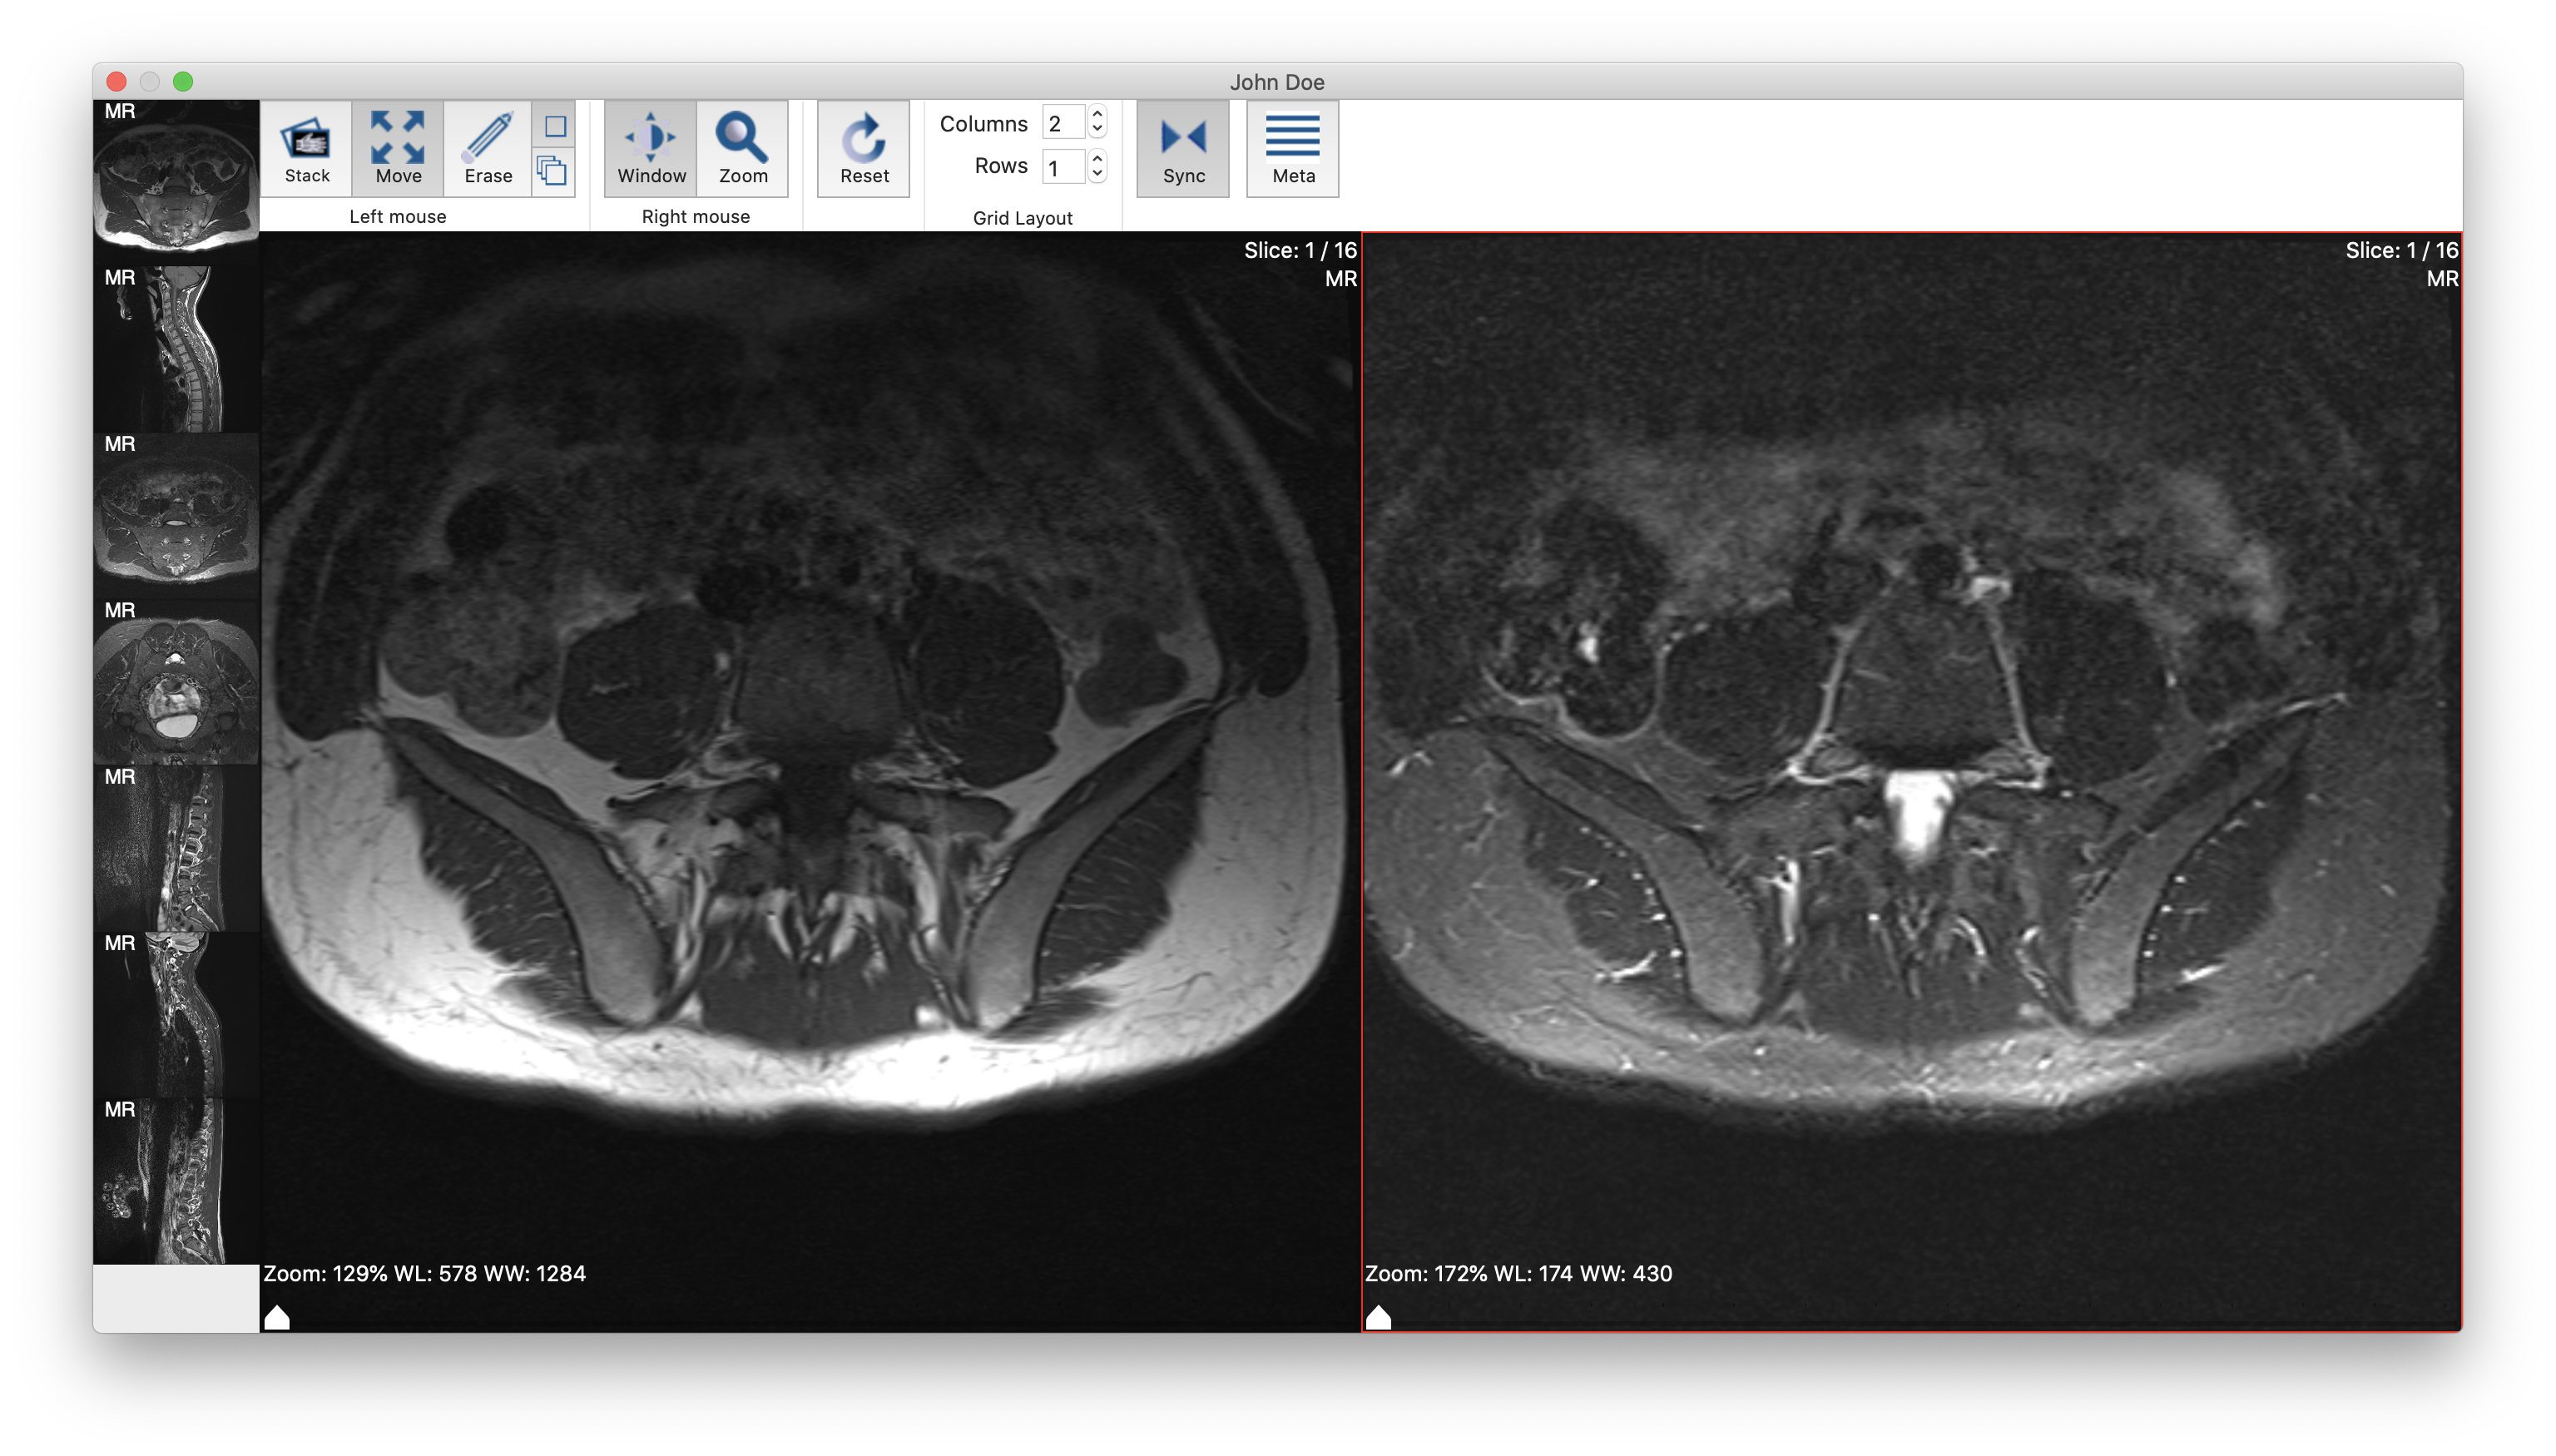
Click, drag, and drop thumbnails from the left side of the window into one of the larger viewer panes to view the image in more detail.
Various controls are available at the top of the window for manipulating the images. Some are grouped with the label "Left mouse", and some are grouped with the label "Right mouse". These labels indicate which mouse button, left or right, should be pressed down when using the control.


Stack is another word for "Scroll". You can scroll though an MRI or CT scan just by using the scroll wheel on your mouse or using the scrolling gesture on your laptop's trackpad, without selecting the Stack control.
However, you can also scroll through the stack of images by selecting the
Stack control, then using the left mouse button to click on an
image, holding the mouse button down, and moving the mouse up and
down on the image.
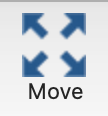
Move lets you move the image around in the viewing area. This control
is used in conjunction with the Zoom control. Once you have
magnified an image, use the Move control by left-clicking and dragging
the image in the viewing pane.
Erase is discussed in detail in the next section, "Editing DICOM Images".
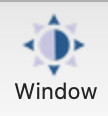
Windowing is the name given to the process of adjusting the brightness
and contrast of an image. Select the Window control, then click and
hold the right mouse button on an image. Drag the mouse up and down
to adjust the brightness of the image, and left and right to adjust
the contrast of the image.
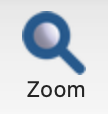
Zoom lets you magnify the image to get a closer look at smaller
details. Select the Zoom control, then click and hold the right
mouse button on an image. Drag the mouse up to zoom in (magnify),
and down to zoom out.
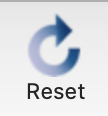
Click Reset to reset the selected image back to its default size
and window settings.
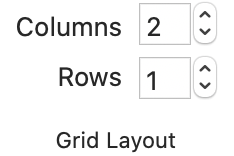
The Grid Layout lets you control how many image panes are visible.
You can have up to 4 panes horizontally, and 2 panes vertically, for
a maximum of 8 viewing panes at once.
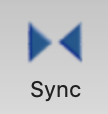
The Sync control toggles whether or not images are synchronized while scrolling. For example, when you have both a T1 and a STIR scan of the sacroiliac joint visible in the viewing panes, it is usually adventageous to scroll the images together. That way, you see the same anatomical location of the joint in both panes, and these remain synchronized as you scroll through either of the images.
With the control toggled on, images which can be synchronized, based
on their meta-data, will be synchronized when scrolling. This has no
effect on images that cannot be synchronized (e.g., a sagittal view and
coronal view cannot be synchronized). Toggle the control off
to stop synchronizing all images.
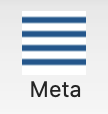
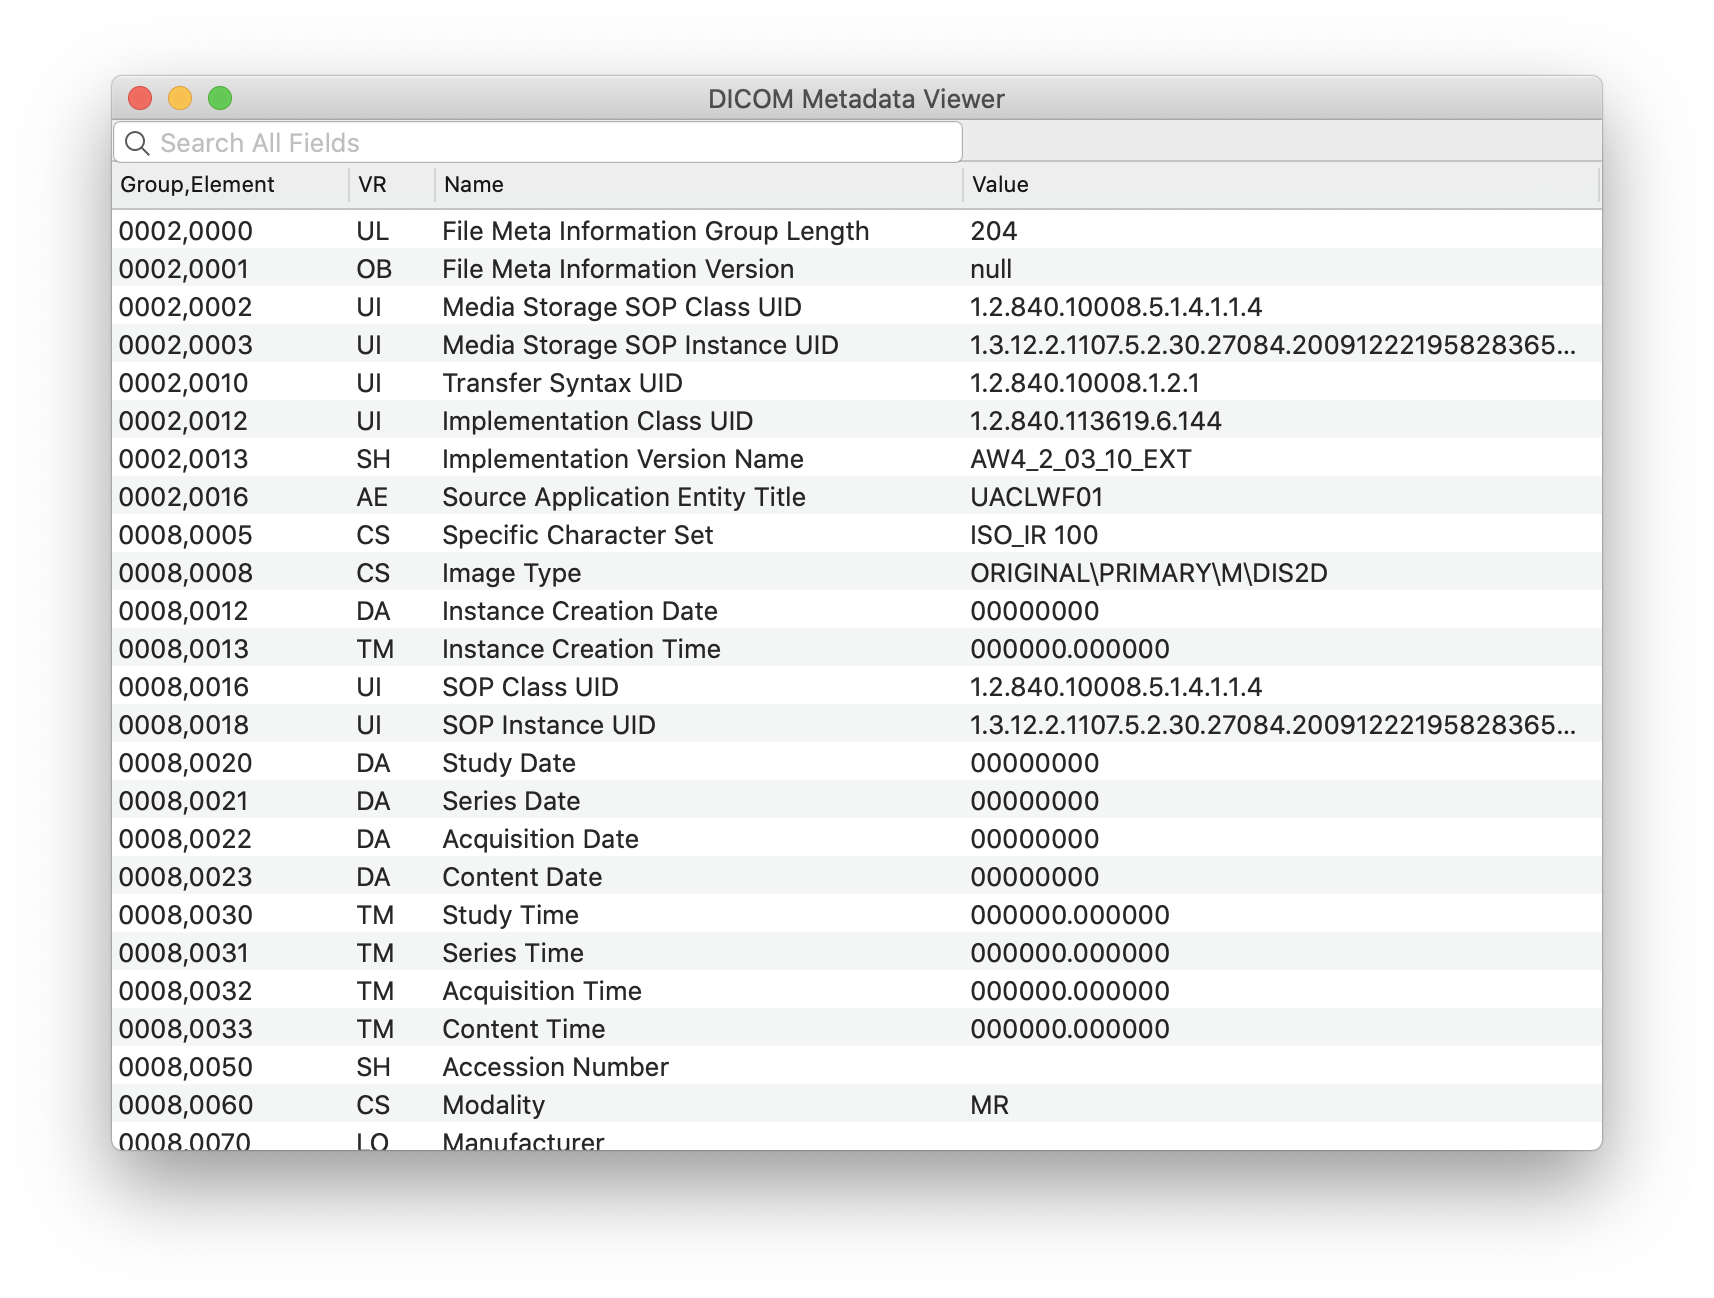
Clicking the Meta button will open another window showing the full DICOM meta-data header. This is full of all kinds of technical information that is of interest mainly to radiologists and imaging centre technicians.
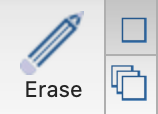
You may need to edit a DICOM image or series in order to occlude patient identifying information that has been burned into the image itself. The CARE DICOM Anonymizer software is unable to automatically detect or remove such information.
Another use of the edit function is to hide areas of an image which might reveal information about the patient that you would like to keep hidden. For example, you can block out areas showing evidence (or absence) of past surgery, if you are doing a research study where image readers are to be blinded to the surgical history of the subjects.
To edit a DICOM image, first open the image in a viewer pane, as described in the previous section, "Viewing DICOM Images". Then follow these steps:
Select the Erase control. There are two sub-controls on the right side of
the Erase control.
Click and hold on the image at the location where you would like to start drawing. You will be drawing a rectangle, so you should click on where you would like one of the corners to be, e.g., the top-left corner.
Drag the mouse diagonally to where you would like the rectangle to end, e.g., the bottom-right corner. You will see a red rectangle drawn as you move the mouse.

When the rectangle is drawn to your satisfaction, release the mouse button. The rectangle will turn grey.
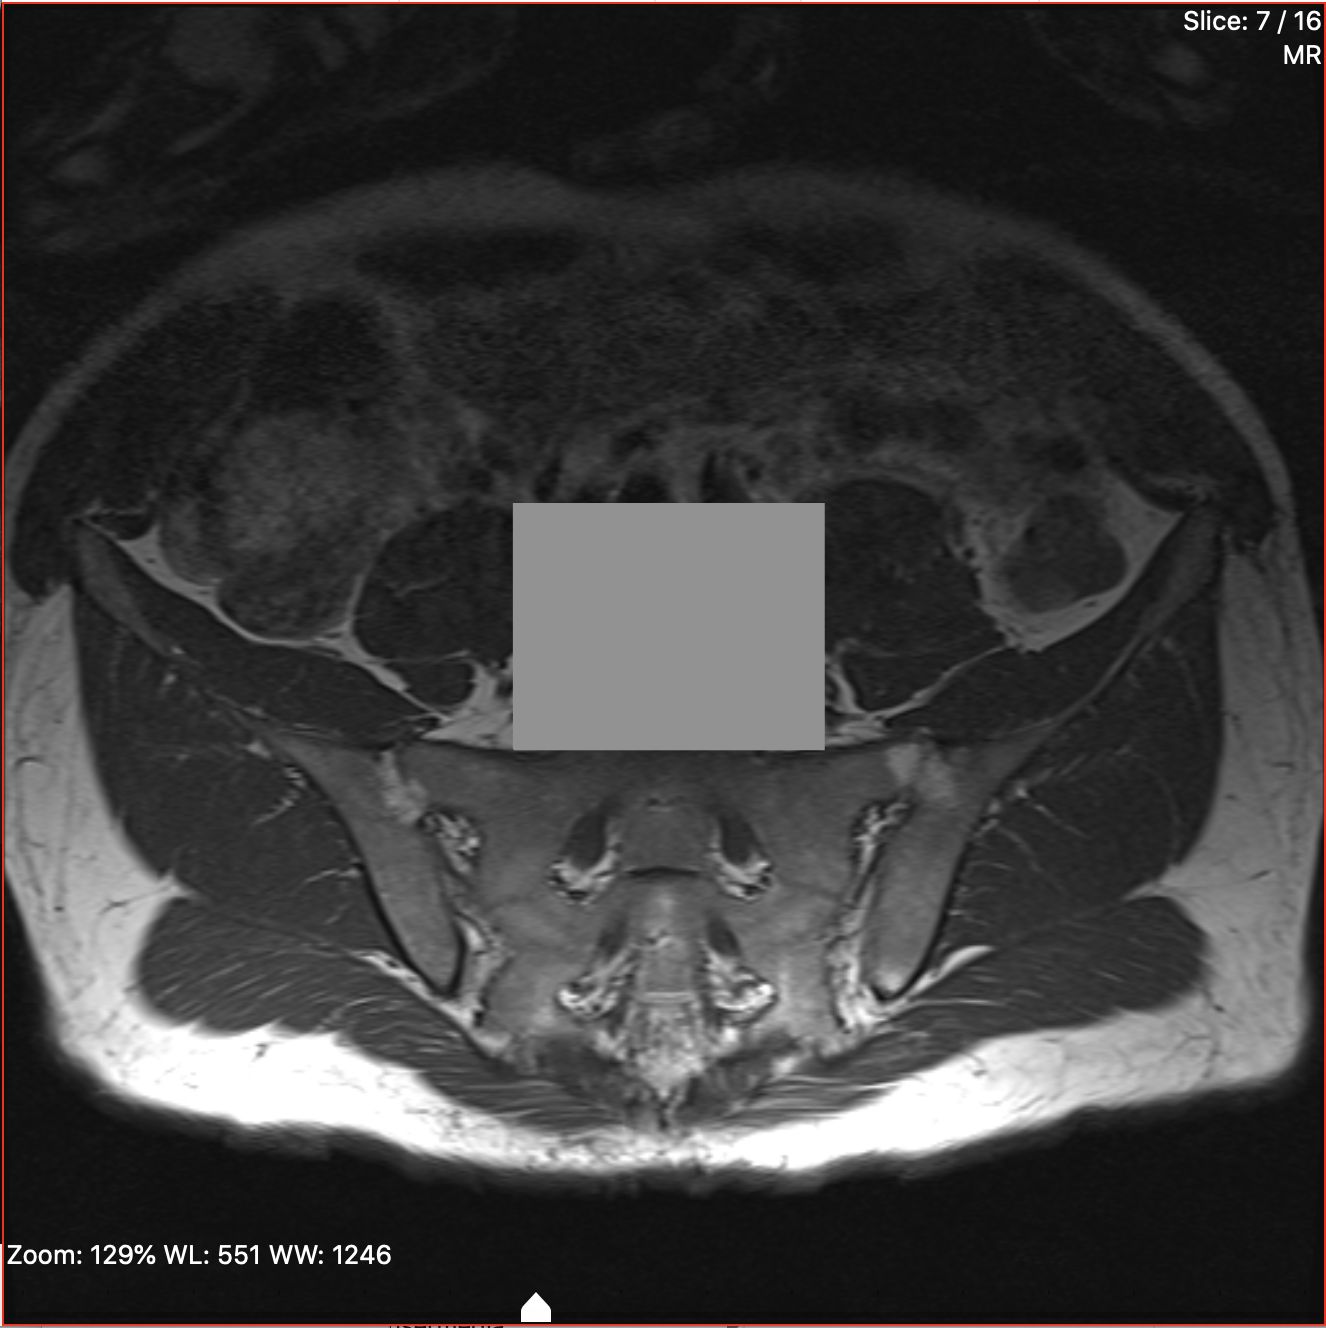
If you make a mistake and would like to remove the last drawn rectangle, click "Undo" in the "Edit" menu (Ctrl-Z on a Windows PC, or Command-Z on a Mac).
When you anonymize the images, all rectangles drawn will permanently become part of the anonymized image(s).
Make sure you have images in DICOM format. You may get images on a CD or DVD from your radiology centre, or you may be able to download them from a PACS system. If you are unsure if your images are in DICOM format, ask your radiology centre for help.
If you haven't already, download and install the CARE DICOM anonymizer.
Run the CARE DICOM Anonymizer software.
If your images are on a CD or DVD, insert the disc into your optical drive, and the software will automatically scan the disc.
Otherwise, if your images are somewhere on your computer or network, click the button, "In a folder on my file system or network". In the pop-up window, navigate to the folder where the images are located and click on the folder. Click "Open" (on a Mac) or "OK" (on a Windows PC).
The disc or folder will be scanned for DICOM format images. All sub-folders will be scanned as well. A summary of how many DICOM files were found and how many distinct patients the images belong to will be displayed at the top of the window.
If the software did not find any images, then no DICOM format images exist in the selected folder or any subfolders. Click on the Back button and select a different folder.
Review the patients and images discovered by the software.
Click on the button "Save them to my file system".
(Mac version only) Click the "Browse..." button and select a folder where you would like to save the anonymized images. (In the Windows PC version, you will select a folder later.)
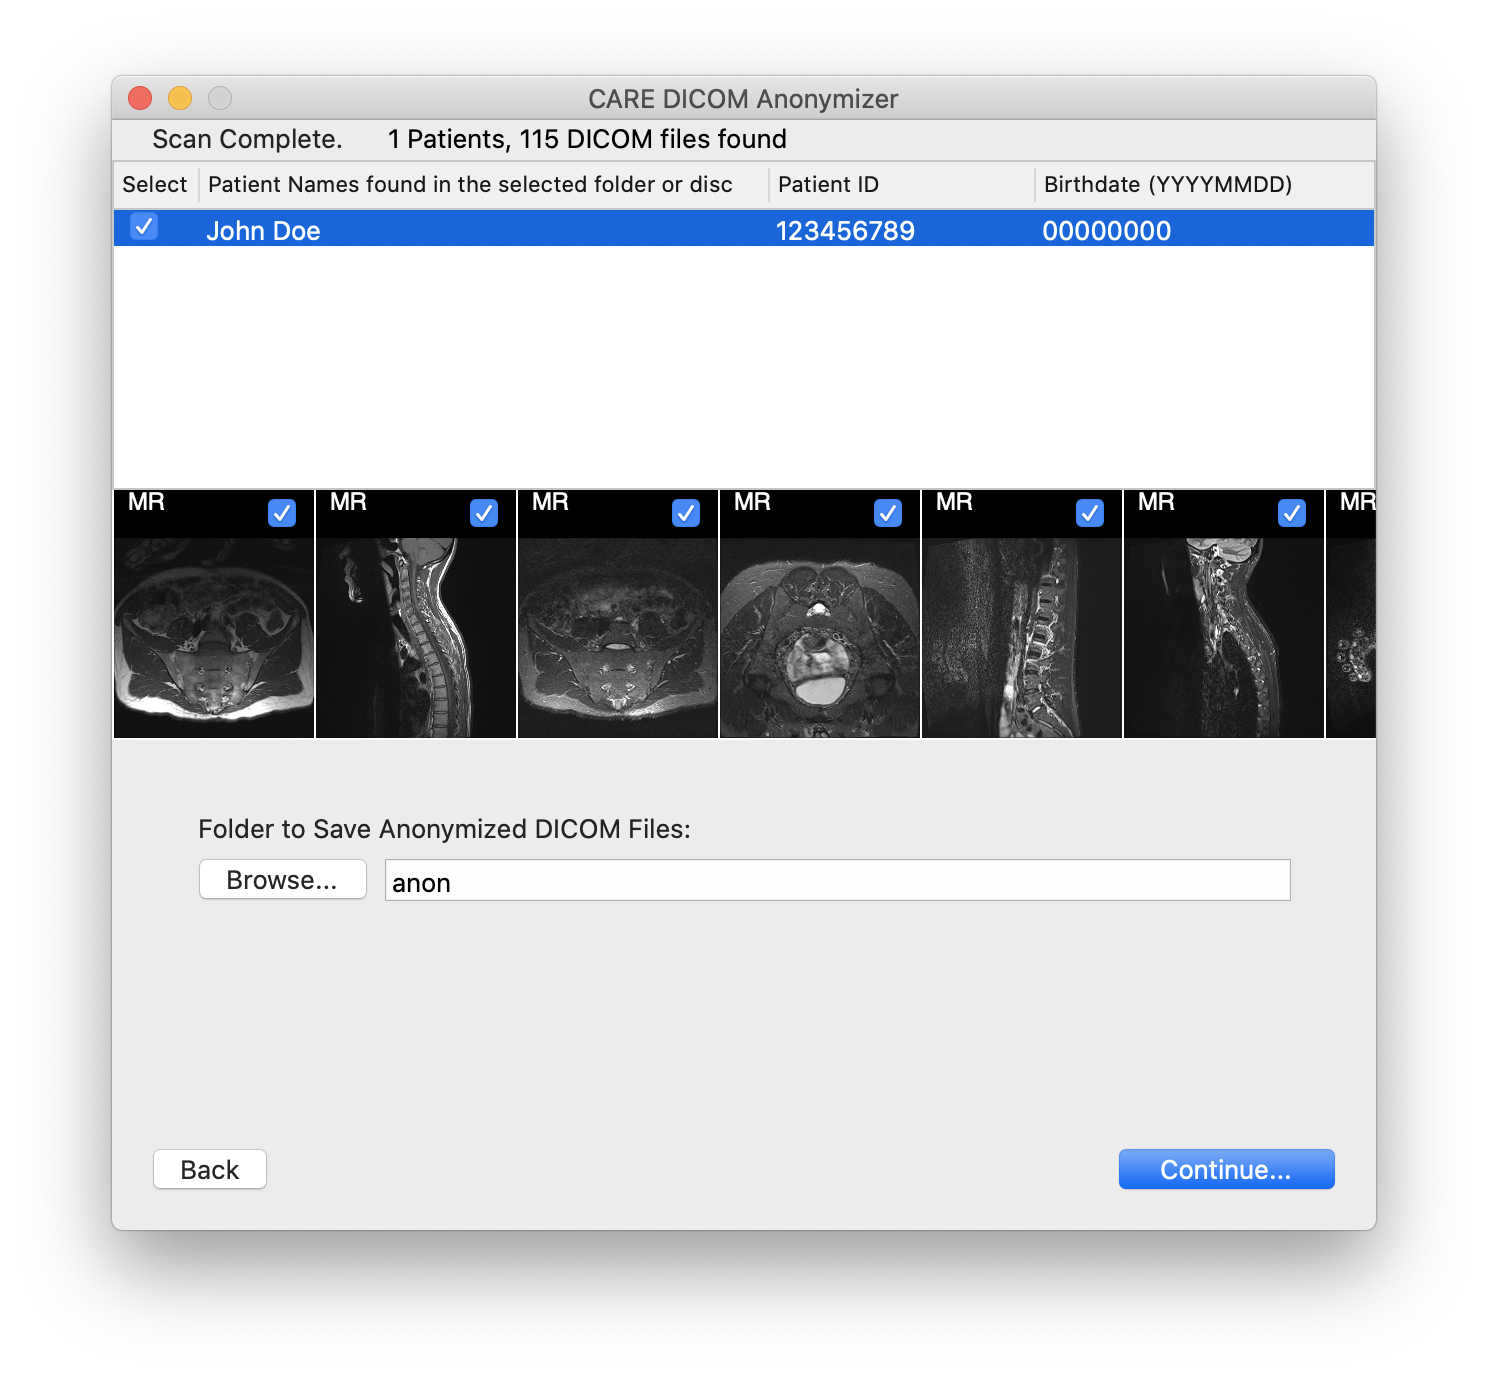
Enter a new patient name and ID to replace the name and ID currently embedded in the image data.
You may leave these fields blank if you do not need or want to replace the name or ID.
Do not send any images to CARE that have not been properly anonymized.
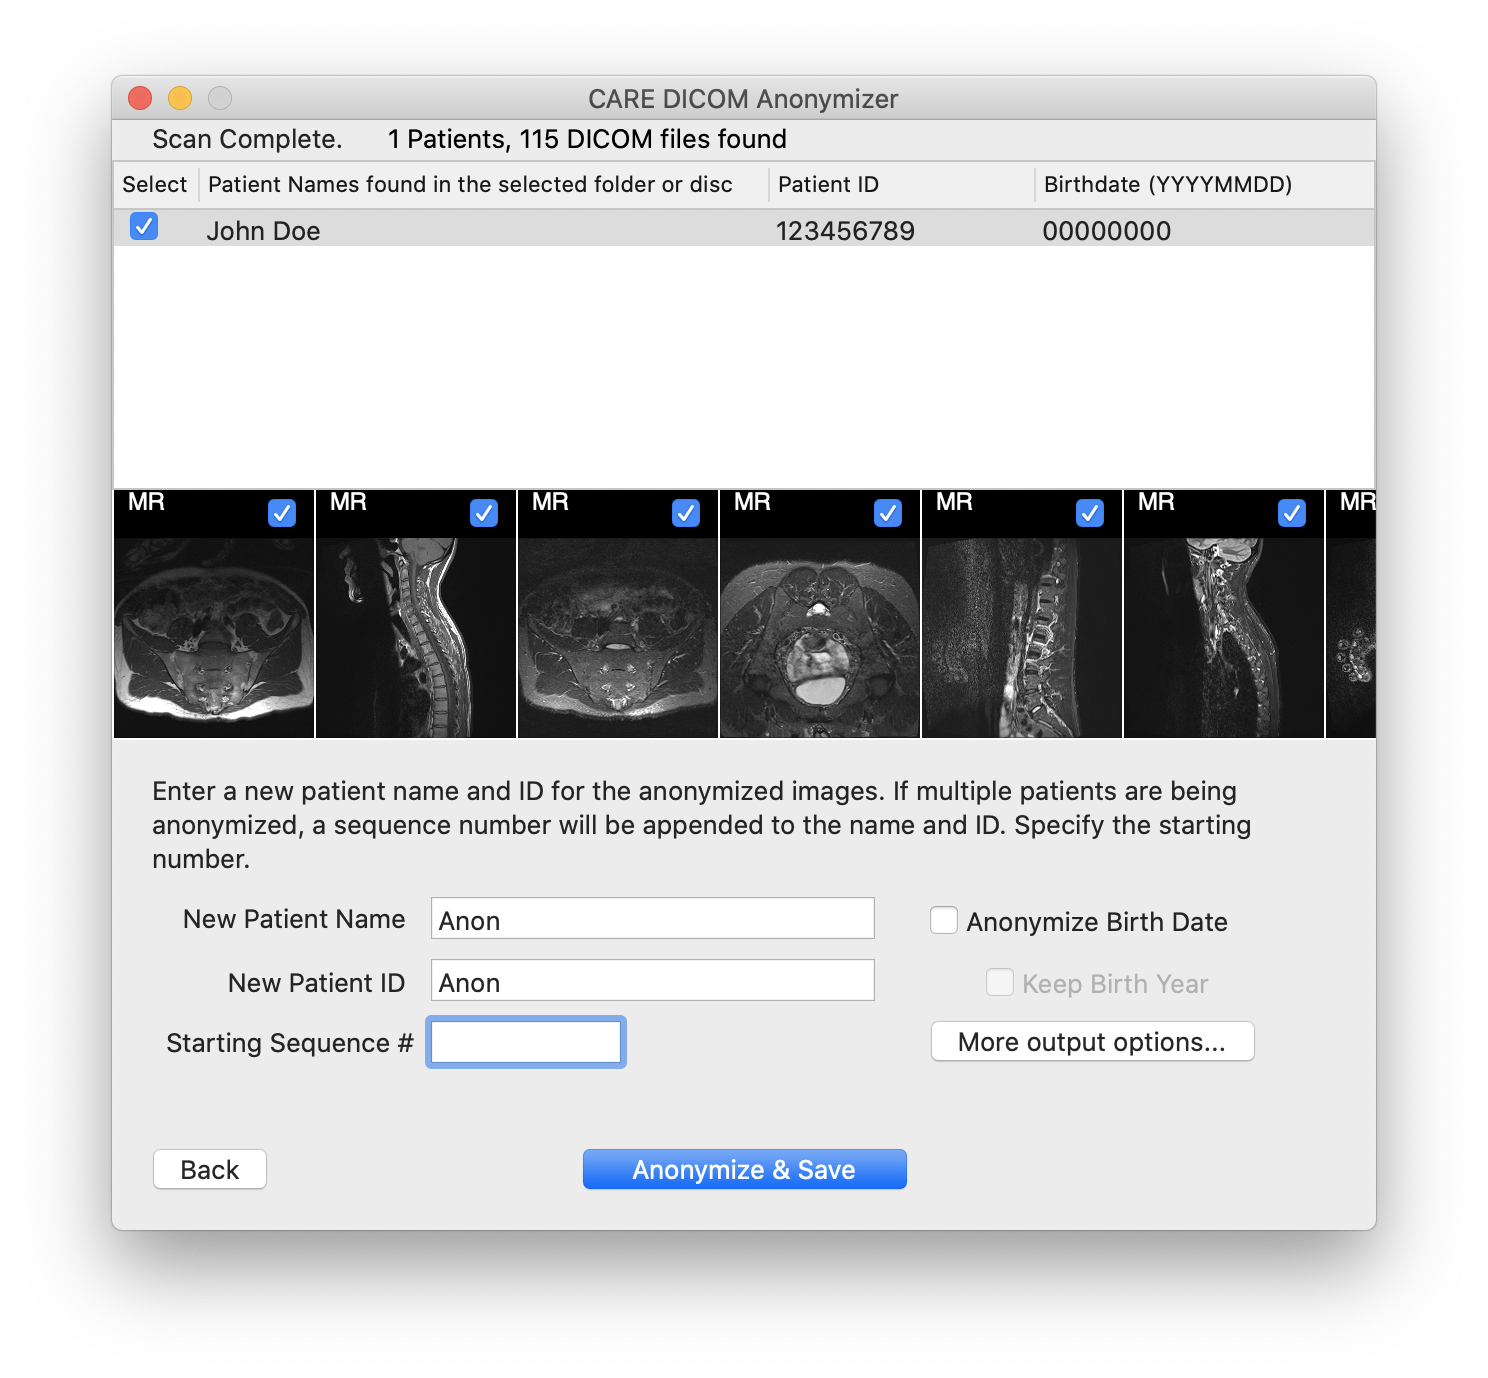
If you are anonymizing multiple patients, enter a number in the Starting Sequence # field. The number will be incremented for each distinct patient listed at the top of the anonymizer window.
For example, if you specify a new patient name as "ANON" and starting sequence of 1, and there are 10 patients listed, the first patient anonymized will be given a name of "ANON01", the second "ANON02", and so on.
Check the box, "Anonymize Birth Date" to remove the patient's birth date from the image data. If you check this box, you may also check the next box, "Keep birth year". This will remove the day and month information from the patient's birth date, but retain the year of birth.
In this mode of the anonymizer, you have access to additional output options by clicking "More output options...". Some of these options are a bit experimental, and don't always produce the results you may expect. You might need to try a few different combinations of options and image sets to achieve the output you want.
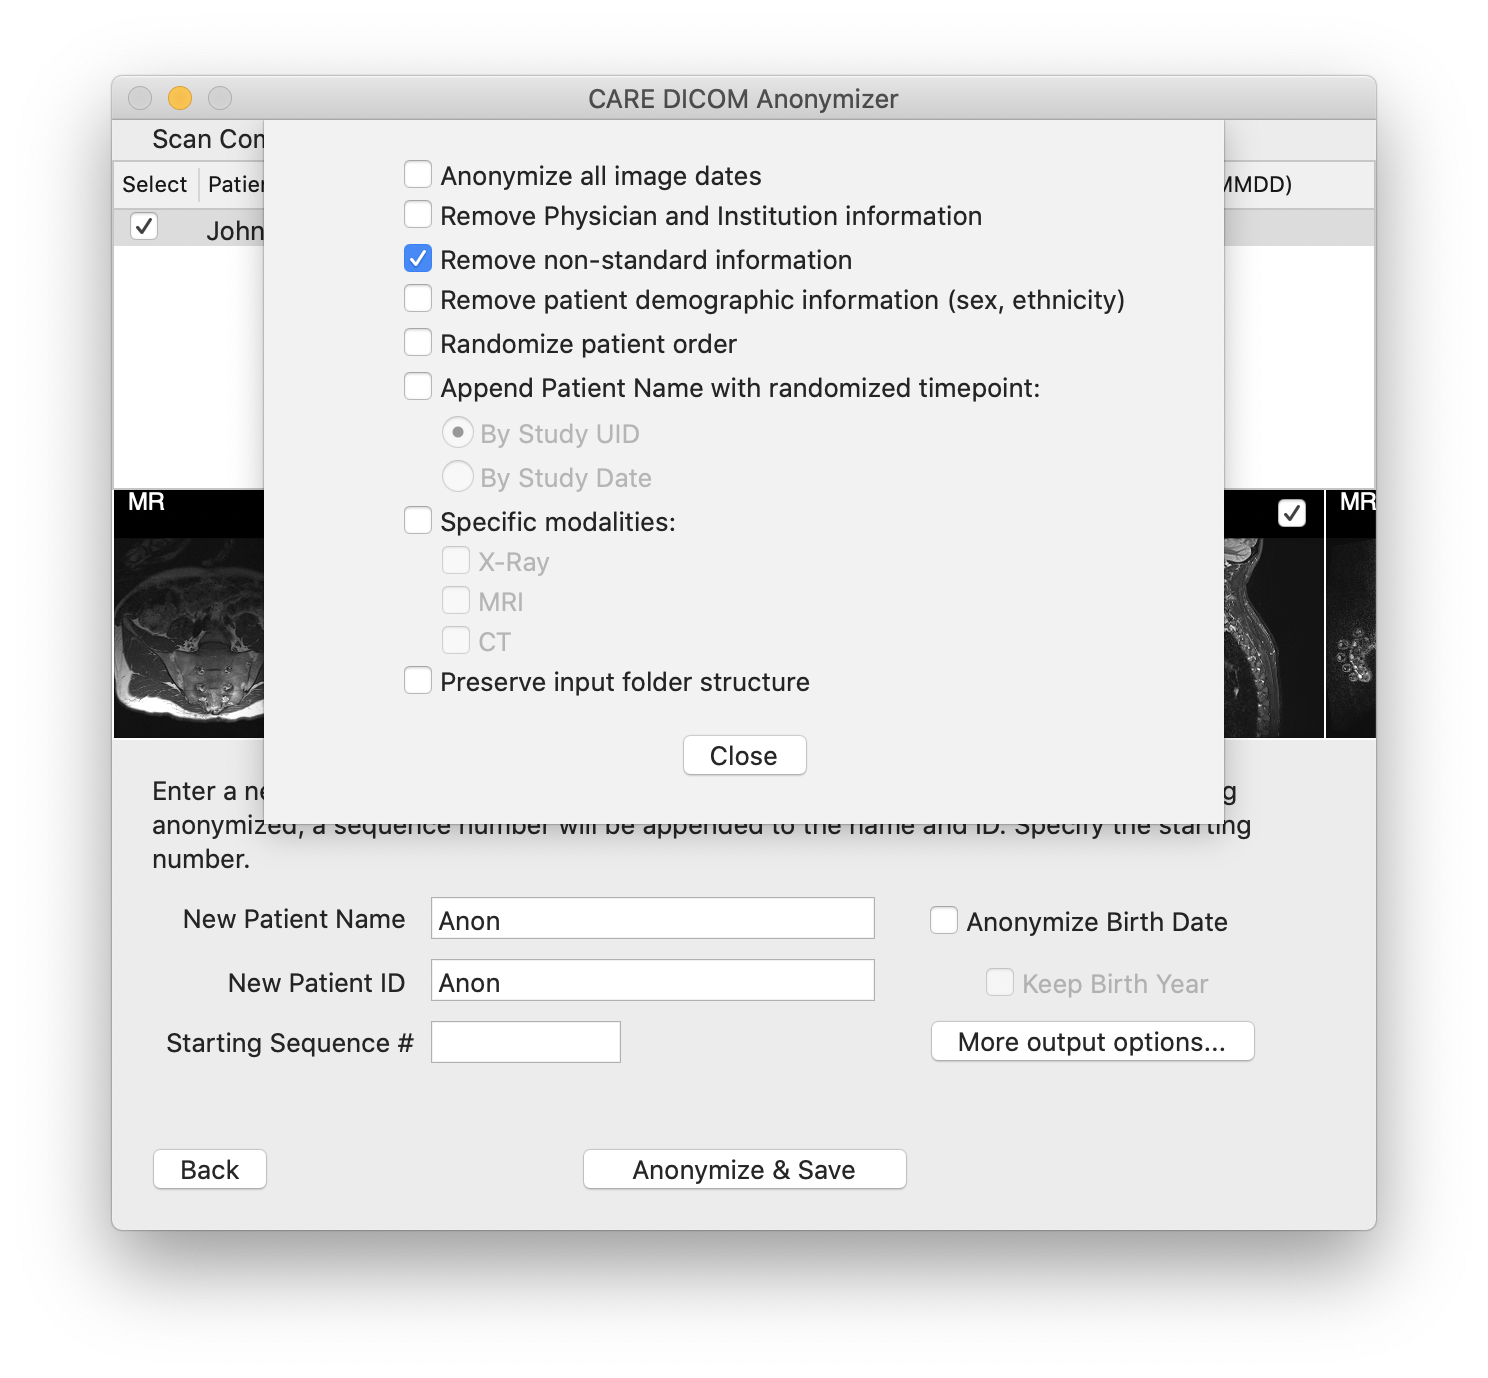
Anonymize all image dates will remove all date information from the image data, i.e., the dates that the images were acquired.
Remove Physician and Institution information will remove any information related to the requesting and performing physician and institution.
Remove non-standard information will remove any information that is not part of the DICOM standard. Some imaging machines and institutions will add extra information into the DICOM meta-data that is not required for the display of images, and this option removes all such information.
Remove patient demographic information will remove any sex and ethnicity information from the image data.
Randomize patient order applies only when multiple patients are being anonymized. Typically, the anonymizer will internally sort the patients alphabetically during the anonymization phase, and the sequence number applied to the new patient name is added in the same order. Check this option to randomize the patient order.
Append Patient Name with randomized timepoint will subdivide each patient's images into timepoints. The sub-options dictate how the images will be subdivided.
The Study UID is a unique identifier given to a set of images done at the same time. The Study UID for an MRI study will be different from the Study UID for an X-Ray, even if done on the same day.
The Study Date is (usually) the date that the images were acquired.
When images are anonymized with this option selected, a letter will be added to the patient name at each distinct subdivision. The letter will be assigned at random, and depends on how many subdivisions exist for the patient. For example, if there are four distinct studies for a patient, each study will be assigned a timepoint of A, B, C, or D, at random.
Specific modalities will output only the modalities selected. This option affects the previous option, in that the study subdivisions will be considered for only the selected modalities.
Preserve input folder structure will output the anonymized files in the same folder hierarchy as the original images. Unchecked, and the anonymizer will create its own folder structure by patient and study. Checked, and the anonymizer will duplicate the folder structure of the source images and recreate it in the output folder.
Be careful with this option, since if the folder names contain any patient identifying information, this information will not be replaced.
Click the Anonymize & Save button, and the images will be anonymized and saved to your file system. (Windows PC version) At this point, you will be asked to select an output folder.
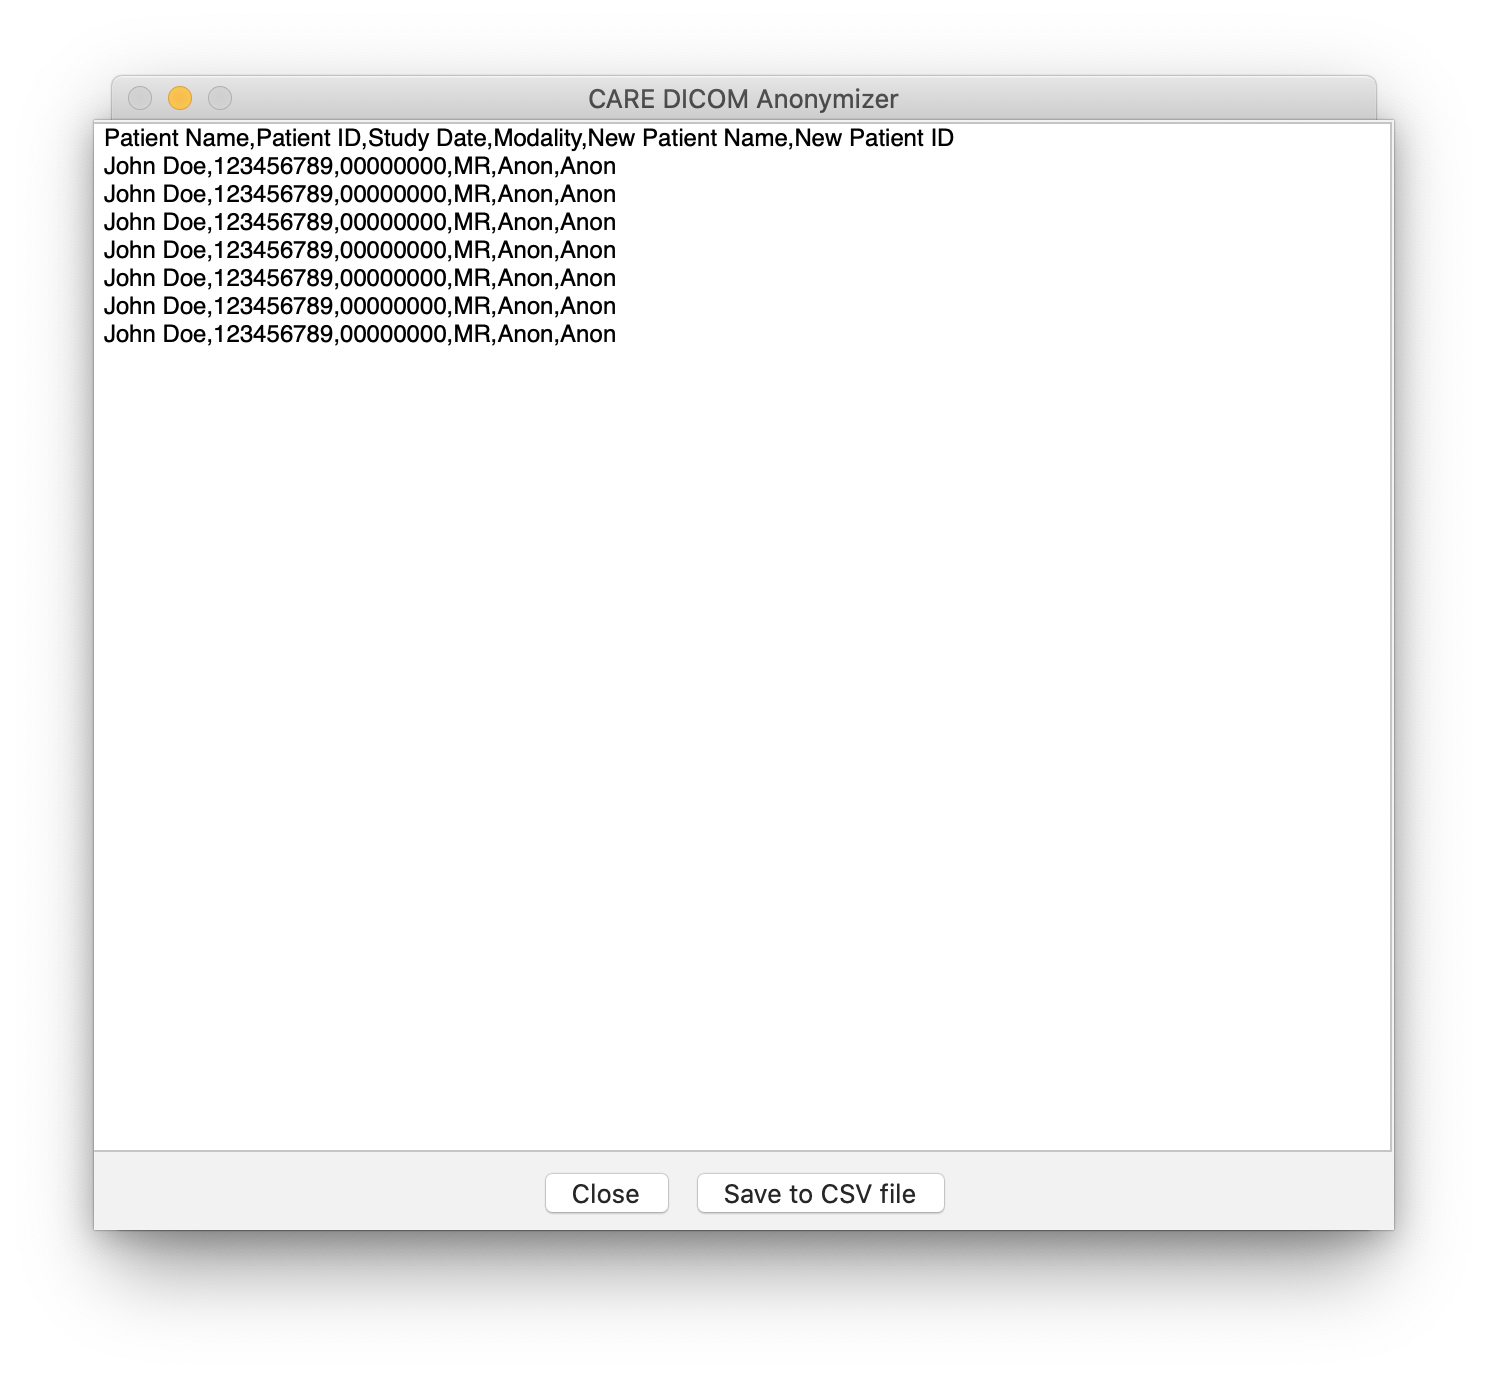
Wait for the anonymization process to finish. After the process completed, a report will be displayed showing the original patient information along with the new anonymized information. You may save the report to a file by clicking the "Save to CSV file" button.
The CARE DICOM Anonymizer software will run on any currently supported 64-bit version of Microsoft Windows or Apple MacOS.
It may run on older OS versions (like Windows 7) but we do not support our software on unsupported operating systems.
Memory (RAM) and storage requirements are minimal. If your computer can run a web browser, it can easily run the CARE DICOM Anonymizer. That said, viewing large image sequences (like CT scans) can take up quite a bit of memory, and in that case, the software will work better with more RAM. 8GB is enough.
You must have a high-speed internet connection to upload images to CARE.